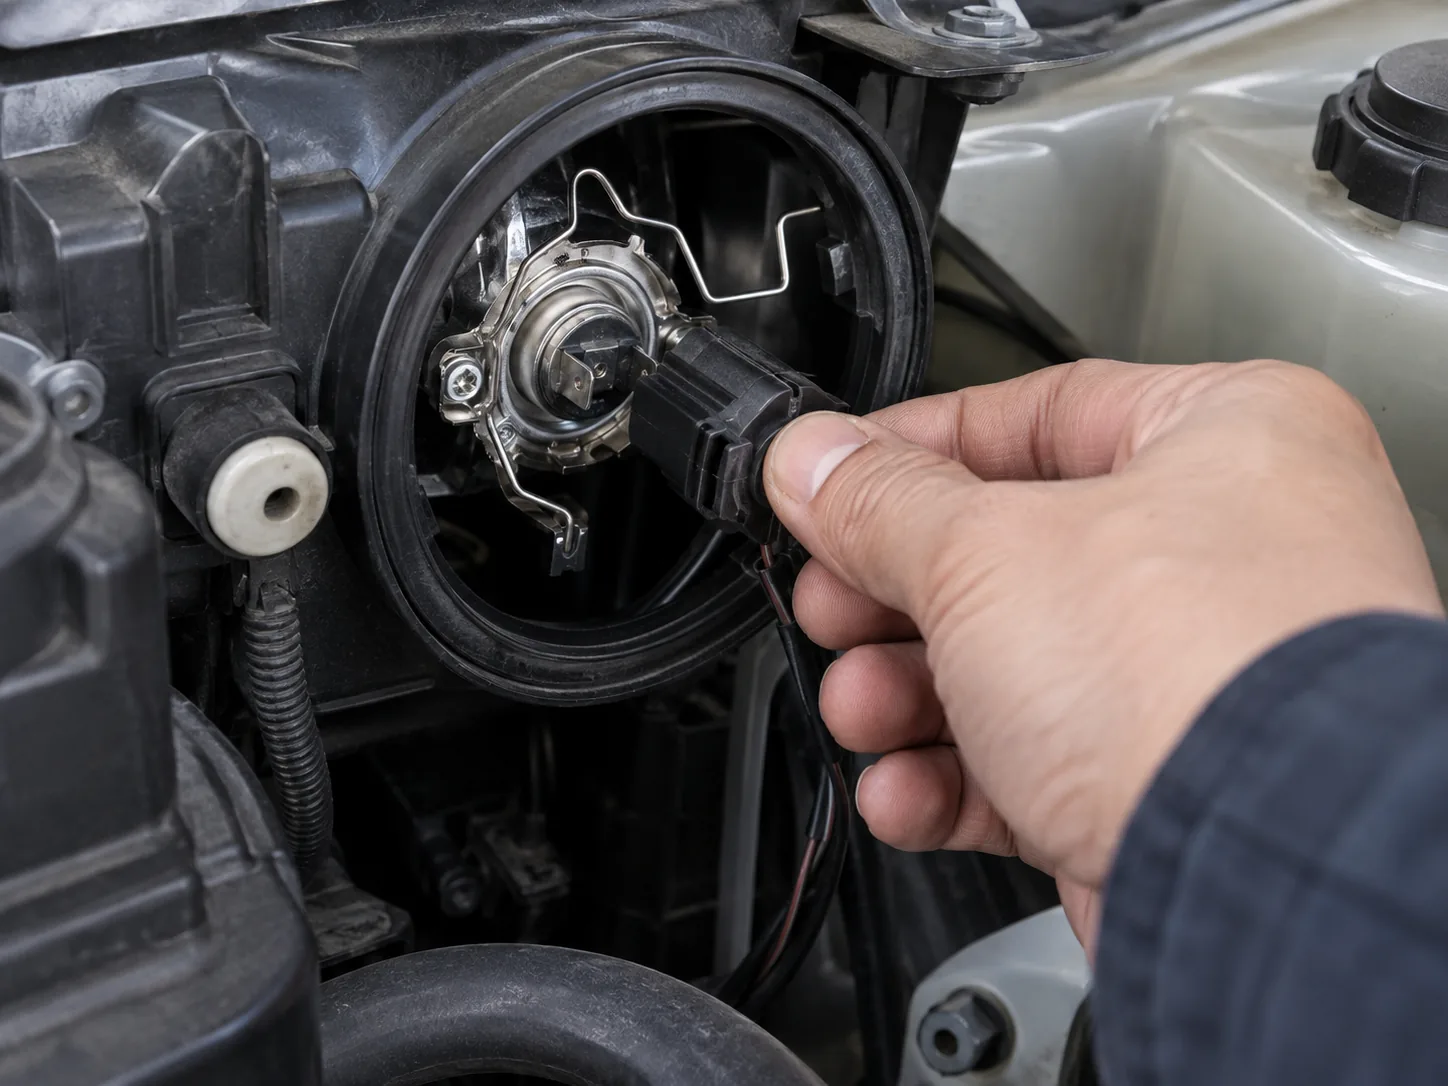

An H7 marking answers one narrow question: the bulb family. It does not tell you whether an LED replacement will lock into your headlamp, clear the rear cover, or work as intended in that assembly. Those are separate checks, and skipping the retainer or clearance check is a common way to turn a seemingly simple bulb swap into a return.
The AUXITO H7 range includes different product designs. AUXITO's current collection describes variants with different adapter arrangements, and its vehicle selector asks shoppers to select their vehicle. That is a reason to verify the exact variant, not to assume that every H7 listing fits every H7 housing.
The First Gate: Is This Position Actually H7?
Check the owner's manual or VIN-specific parts catalog for the exact position you plan to replace: low beam, high beam, fog, or another lamp. If you can safely inspect the installed bulb, read its marking and compare it with the vehicle documentation. Low-beam H7 does not prove that high beam or fog is also H7.
If the bulb marking and catalog disagree, stop and resolve the difference before ordering. Do not use a model-year example from a generic article as a substitute for trim- and market-specific documentation.
Use the result this way: if H7 is confirmed for the exact position, continue to the holder and dimensions. If H7 is not confirmed, stop here. If you cannot identify the lamp position or vehicle configuration, gather that information before looking at product tiers.
Dry-Fit Audit: Three Things That Can Stop the Install
Once H7 is confirmed, do not start by comparing brightness. Check these physical and electrical bottlenecks for the exact product variant:
- How the original bulb is retained. Identify the spring clip, holder, or factory adapter. Do not assume a generic adapter will work.
- Whether the selected product explicitly supports that arrangement. AUXITO's H7 catalog includes products with different adapter notes. Confirm the exact product page, not just the collection heading.
- Available rear space. Compare the bulb, driver, and heat-management components with the cavity behind the headlamp. Verify that the dust cover can close as intended.
- Electrical notes. Check product-specific polarity, CANbus, and anti-flicker information. Do not add a decoder or resistor without a documented need and compatible instructions.
- Installation procedure. Follow the vehicle service manual and product instructions. If access requires removing parts you are not equipped to reinstall correctly, use a qualified technician.
For an H7 design that AUXITO describes as using the factory adapter, verify that this statement applies to the exact item and vehicle configuration you selected. A product-page description is not proof of fitment for another year or trim.
There is a concrete reason to check the space around the connector, not just the bulb body: OSRAM's instructions for its own H7 LED/CANbus setup warn shoppers to confirm room for the CANbus unit and check whether an adapter sits between the bulb and connector. That warning is specific to that OSRAM product family, but it illustrates why an H7 base match alone does not settle an installation. OSRAM H7 CANbus mapping and clearance note
One H7 listing example: Y13 with a dedicated retainer
AUXITO’s Y13-H7-G2 product page describes a dedicated H7 retainer-adapter version and lists 80W per set, 16,000 lumens per set, and 6500K. The page also limits its compatibility claim to named vehicle applications and exclusions. These are manufacturer-listed details, not independent fitment or beam verification. Match the exact year, trim, lamp position, installed holder, and rear clearance before treating this listing as relevant. See the AUXITO Y13-H7-G2 product details.
Two stop-work examples: if the factory holder is unclear, photograph it before removal when the vehicle procedure permits and ask AUXITO about the exact variant. If the bulb fits but the rear cover cannot close, the fit has failed; do not leave the housing open or cut the cover to force a result.
Do Not Choose by Headline Brightness Alone
For a headlamp, brightness claims do not answer whether the source works correctly with the optical assembly. The relevant decision is whether the exact lamp, replacement source, aim, and use comply with applicable requirements and provide an acceptable beam. A bulb that powers on is not enough to establish that.
For U.S. road-use context, NHTSA's February 13, 2024 interpretation distinguishes an integral LED headlamp from an LED light source substituted into a replaceable-bulb headlamp. Its interpretation says no LED source was then listed for use in a replaceable-bulb headlamp under FMVSS No. 108, and separately notes that state law addresses individual vehicle modifications. This is dated federal guidance, not individualized legal advice or a statement about every jurisdiction; re-check current rules before publication or use. NHTSA interpretation on LED headlamps
Pass, Pause, or Stop
| What you find during the audit | Decision |
|---|---|
| The manual confirms H7; the product documents the holder and dimensions; the cover closes | Continue to electrical and road-use checks, then review the exact product's return terms |
| The H7 code is confirmed but the holder or dimensions are unknown | Pause; identify the hardware or ask the seller/manufacturer before ordering |
| The housing cannot close, wiring heats, or the beam is visibly abnormal | Stop; do not modify the housing to make the product fit |
| A warning or flicker appears and the exact product's compatibility guidance is unclear | Stop troubleshooting by guesswork; get product-specific help before adding a decoder or resistor |
| The vehicle is used on public roads | Verify current requirements for that headlamp and jurisdiction; socket fit is not approval |
This sequence is intentionally an installation audit, not another bulb-size lookup: holder → rear clearance → sealed cover → electrical behavior → beam/road-use requirements. If any physical gate fails, a brightness comparison is beside the point.
Installation and Beam Check
Use the vehicle service procedure and the instructions for the exact bulb. Do not force the retainer, trim the housing, or leave the dust cover unsealed to make a product fit. After any permitted replacement, verify that the bulb is seated and that the headlamp operates as intended. If the beam is visibly abnormal, the housing will not close, a warning persists, or wiring heats, stop using the retrofit and restore the original setup or consult a technician.
Do not treat an informal wall check or another driver's reaction as certification that a headlamp meets road-use requirements. Follow the manufacturer's aiming procedure and applicable inspection rules.
After confirming H7 at the intended lamp position and checking the exact product's retainer and rear clearance, compare current AUXITO options here:
Disclosure: ModernCarGear may earn a commission if you buy through this affiliate link, at no extra cost to you.
Sources and Verification Notes
| Source | Claim checked | Limitation |
|---|---|---|
| AUXITO H7 collection | Current range and product-specific adapter/fitment navigation; checked 2026-10-08 | Must open the exact product page; collection alone does not confirm a vehicle |
| AUXITO Y13-H7-G2 product page | Listed retainer-adapter variant, 80W/set, 16,000 lumens/set, 6500K, and product-page applications/exclusions; checked 2026-10-10 | Manufacturer listing; not independent fitment or beam verification |
| NHTSA interpretation 571.108--NCC-230201-001 | Dated federal interpretation on LED sources and headlamp types | Dated 2024-02-13; not a state-by-state legal opinion; re-check current authority |
| Vehicle owner's manual / VIN-specific parts catalog | Bulb family, lamp position, and service procedure | Depends on exact vehicle configuration |
| OSRAM H7 CANbus mapping list | OSRAM advises checking clearance for its CANbus module and checking for an intermediate adapter in that product setup; checked 2026-10-08 | Product-specific OSRAM note; do not infer AUXITO dimensions or fitment from it |